Are you guys sick of my basement yet? I kind of am. I promise you this is the last installment of this series, but I can't stop until you've seen the rest of it! Plus I think this part is the most dramatic change, so that's kind of fun too!
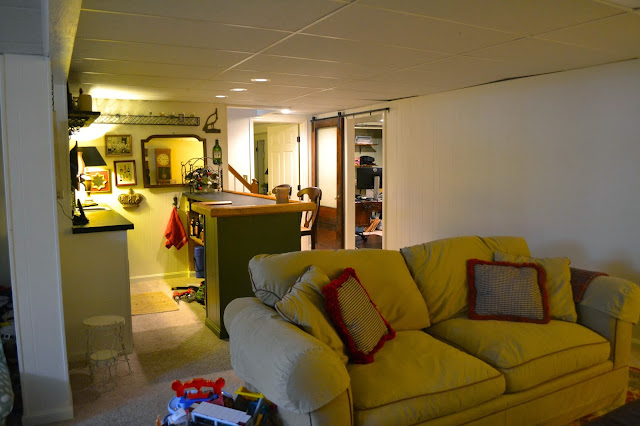
Here's a before shot of the basement. You can see off in the distance that the left side (as you come down the basement stairs) was open, with a large structural pole in the middle (covered by paneling). They had a pool table over there.
We really liked the openness of it, but when sweet Vivi was born, we gave up our guest room to make her nursery. (Good problem.) Plus, my husband Brent works from home, so he was desperate to have an office with a real door that closed, so that he could actually get stuff done if the kids were in their playroom during his workday.
I am so proud to say that handyman Brent did all this! He built walls, installed doors, hung new paneling to match the old stuff, moved the stair railing from one side of the stairs to the other, built shelves...basically everything! We hired someone for the electrical because we thought it would be better if the house didn't burn down. :)
So that door to the right leads to Brent's (tiny) home office, but he claims he likes that room better because it catches some of the natural light from the other side of the basement. My favorite part is that antique door. We picked it up on Craig's List, sanded it down and re-stained it, found some new hardware, and then hung it on a sliding track. It's such a tiny room that a traditional door would have been really hard. Plus, we love how the warm wood of the antique door is the first thing you see when you come down the stairs!
Here's a slightly better shot of the office. It's so small and the lighting is so weird that it's hard to get a good photo. And I haven't found time to hide all those computer wires so it's not very pretty either!
Behind Brent's desk is a closet with some simple wood shelves. I hung those curtains believing that they would actually close and hide some of the clutter...but they've never once been closed, I don't think. Oh well!
The view from his desk chair. My husband was (he would say is) an Eagle Scout. See all those patches? Maybe that's why he's so handy. He could probably also tie some really cool knots, but we haven't found an avenue for that particular skill yet. :)
OK, back out to the hallway. Here's a shot of the old basement, with the stairs on the left to orient you.
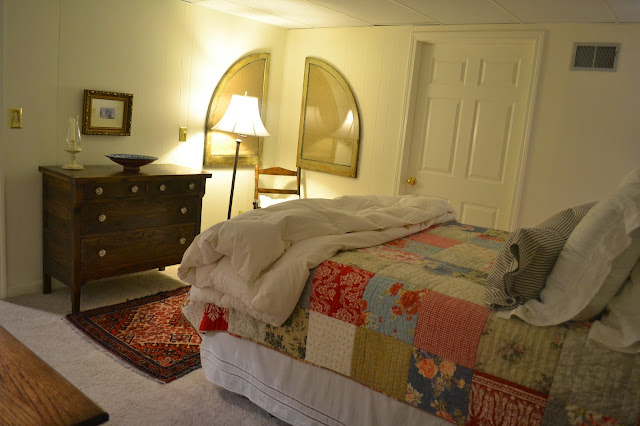
And here's our new guest room! You can kind of see the doorjamb in the foreground there, which is now the first thing you encounter on your left when you get to the bottom of the stairs.
I really wanted to make the room feel cozy, which I guess is good because there are no windows over on this side of the basement. I didn't want people to feel all creeped out when they stay at our house! This inspiration picture below (from Ballard I think?) was kind of what I was going for...but I was trying to use what we already had in the house, so mine's not nearly as pretty as theirs!
It's not a huge room but there's enough space for suitcases and hopefully no one has yet hit their head on our drop ceiling tiles. That door you see below leads to the storage room and furnace.
Antique dresser from Craig's List with some simple new knobs from Hobby Lobby to spice it up a bit!
My little helper in the corner!
I tried to add a lot of little lamps around the room, but kept the shades black with gold lining in the inside. The gold lining reflects the light and is key for warm light. If you have a black shade without a lining, I find the light to be cold and almost purple...makes me feel like I'm in a hospital! So if I have a shade that doesn't have a lining at all, I've actually had good luck with using a thin bead of hot glue on the inside edges and some gold fabric and attaching one myself. OR, if your shade has a lining already but it isn't gold, you can get gold acrylic paint and some liquid fabric paint medium (to mix with regular paint to create fabric paint) and re-paint the inside of the shade if it's got a different color liner. Make sense? I can't tell you what a difference it makes to the whole feel of a room!
Below is a scrap piece of barn wood on the wall. We attached some old doorknobs we'd collected and then I just sealed the barn wood with some clear polyurethane. The queen headboard was another Craig's List find, and originally it was all wood, but I painted the trim and bedposts with some Annie Sloan Chalk Paint in French Linen (dark wax on top).
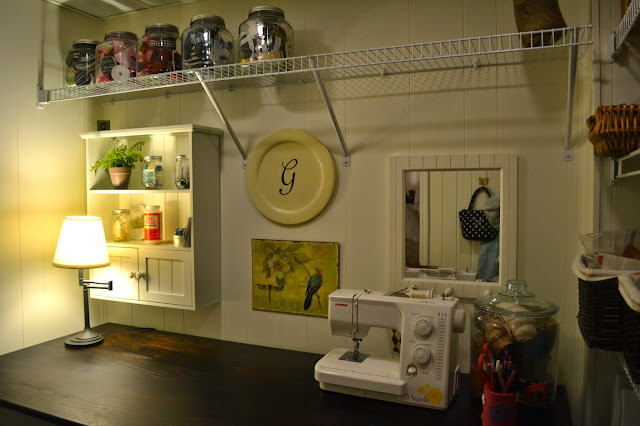
This is the closet off the guest room. It was big enough to fit a work table in there, so now I can keep my sewing machine set up and not have to move it from room to room to get it out of the way! (Still I can only sew straight lines.)
Lots of shelves and storage options, but we made sure to include a spot for guests to hang some clothes if they need to. Just have to move my gift wrap out of the way if they do! :)
My husband rolls his eyes at the sheer number of little lamps I have all over my house, but they make such a difference for me, especially in this closet. Instead of a teeny tiny prison cell, it actually feels cozy when I'm working down here!
So there you have it! The basement is complete. Now I'll stop going on and on about it like your Great Uncle Merle with a four-hour slide show of his trip to Arizona. :)


6 comments:
Everything looks lovely! I especially like the bedding in your guest room!
Love the basement remodel! I especially like the door you found and the gold lining idea. I have never heard that so thank you for sharing!
Thank you ladies! :) The gold lining thing was a revelation for me, so glad I could pass it along!
Your basement looks a lot better now, and it became homier too. It is certainly spacious, and you were able maximize its use. I'm sure that your husband is really comfortable now in his office, for it now has a door to keep his privacy while doing his work. Congratulations for this wonderful renovation, Carrie!
Gregg Hogan @ American Basement Solutions
You clearly knows how to make the best use of things. I am so glad for you.
I think you've done amazing things refurbishing your basement while having a little one to bring up too! Thankfully, you seem to have had a great handyman. Actually, I didn't think your basement looked bad in the 'before' shot. Maybe a little outdated. However, I have to say the refurb looks amazing, in all the rooms. Your little one is a sweetie too!
Post a Comment